
How Did They Create That Closet?
- June 23, 2020
- •
- by Columbia Forest Products
It’s no secret that DIY and home remodeling projects have been keeping homeowners busy these days. Many homeowners have had more time to clear out clutter, make repairs and create more functional storage spaces in their homes. The closet makeover is an especially popular project right now because it helps homeowners stay organized, so they’re more comfortable while they’re staying at home.
Here’s how one blogger and DIYer took her master suite from “glum to glamorous” by creating a functional, fresh new closet design.
Planning Out a New Closet Space
Many homeowners are willing to tackle a closet makeover project because it benefits them in immediate and important ways. “Creating a harmonious closet not only keeps your house tidy, it may help maintain peace in your relationship,” writes Jeannie Matteucci for HGTV. “Deciding what you have to store is especially important for shared closets, and designating specific areas for each person is essential.”
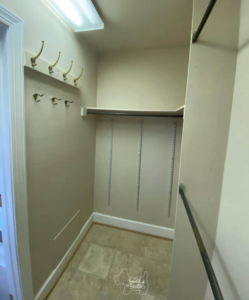
Stay-at-home orders gave DIYer, Scottie of the “Saved by Scottie” blog the opportunity to create a new closet design in her master suite. She wanted to reorganize the space, but the original closet area just didn’t function how her family needed it to — even with reorganizing.
“The original closet was hideous, messy and there wasn’t a way to keep it neat,” explained Scottie. When asked what inspired her to give the closet a makeover, she was straightforward. “Mostly desperation,” she admits.
She’d drawn up the closet plans a couple of years ago, with a friend who is a professional organizer. “I’m a tactile person, so I’m all about graph paper. I sketched it on regular paper to get it out of my head, then used graph paper to get it more finalized.”
Scottie drew the plans multiple times to get details finalized, and took photos to capture the closet makeover design. It might seem tedious, but she was grateful to have multiple drafts of her plan.
“My goats ate my original drawings on my graph paper. Luckily I had taken pictures of the plans,” laughs Scottie.
Steps Toward a Complete Closet Makeover
Scottie’s closet redesign gave her a more functional and storage-friendly space. But to get those results, she needed the right materials and design strategy.
She says that time was one of her main challenges for this project. “It always takes longer than I think it will,” says Scottie. “I spent a lot of time putting thought into it before starting.”
The floors and walls of her closet also posed a few hurdles, which added to the time Scottie spent on the makeover. “The way it was built was really weird,” she explained. “Getting the walls down was a little tricky and caused some complications…”
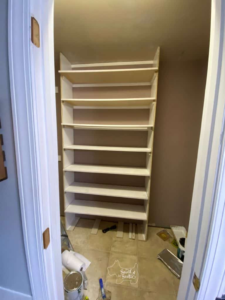
Choosing high-quality materials made the makeover easier on Scottie, however, and even saved her time during the project. She didn’t paint the wood for the shelves until after the panels were installed, which made finishing the shelving a little trickier. “At least, using PureBond plywood, I was able to skip the step of sanding to smooth at the start. It came smooth enough to paint right away,” Scottie explained.
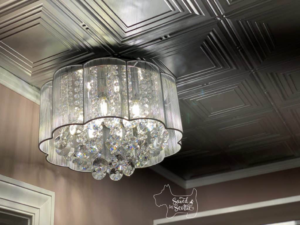
She wanted a more glamorous, luxurious feel to her closet design, along with extra storage. Scottie plans on remodeling the floor of the closet down the road but wanted to address the ceiling and lighting in the space in this redesign.
“I didn’t want to paint the ceiling,” explains Scottie. Instead, she used acoustic panels on the closet ceiling, which she spray painted silver and simply attached to the ceiling surface with adhesive. She even installed a chandelier for a touch of chic but functional lighting.
Final Tips for Your Closet Makeover
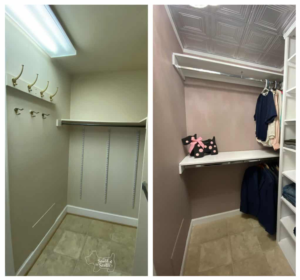
Scottie and her husband wound up with a spacious and versatile closet design that they’re very pleased with. “To walk in there is so pleasant,” says Scottie.
If you’re ready to get your closet makeover underway, Scottie has a few additional tips for DIYers and designers:
- Give yourself a buffer of time, so that you allow for surprises or mistakes during your project.
- Be flexible with your design. Having plans is important, but there might be some aspects of your space that call for other solutions. “The one thing I did differently was put the corner shelf at an angle, rather than an L-shaped shelf at the top,” explains Scottie. “The new angle shape was more design-friendly.”
- Work with reliable materials that meet your project requirements. “I like working with decorative hardwood plywood – it’s straighter and smoother than the rough structural kind of plywood. I find the quality of Columbia Forest’s PureBond is noticeably different. ‘Furniture-grade plywood’ is how I describe it,” says Scottie. “And it’s formaldehyde-free…which is really important these days and especially in a non-ventilated room like a closet. You don’t want any formaldehyde vapors to be coming out of the woodwork and being trapped in there.”
Working with durable and high-quality products like PureBond plywood gave Scottie and her family a closet space they love, and it’s one that will last for as long as they’re in the home.
“Now we can see everything!” says Scottie. “It’s my favorite place in the house,” says Scottie. “As ridiculous as it sounds, that’s my favorite part.”
To see more before and after photos of Scottie’s project, check out her site.
Or get more ideas for creating the perfect closet space: Check out our shelving and drawer solutions here.