
Sawing Plywood
- June 29, 2020
- •
- by Columbia Forest Products
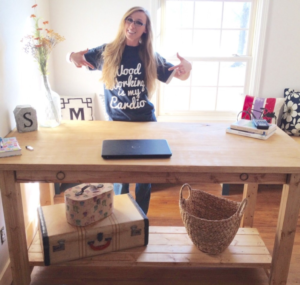
Last year, we featured a stunning DIY kitchen from Shara of Woodshop Diaries. Shara has completed a few other woodworking projects since then, and we caught up with her recently to see if she had any recommendations for DIYers who are using hardwood plywood.
“If you do a lot of woodworking — especially cabinets, built-ins or storage pieces — hardwood plywood quickly becomes your best friend. But sometimes breaking down a full 3/4 inch panel can be a little … daunting,” says Shara.
Here are a few of her favorite tips to help you work with plywood on your next project. From saw options to cutting methods, Shara has several recommendations that will make sawing plywood a smoother process.
Table or Circular Saw?
Cutting down plywood isn’t everyone’s favorite task, even for determined DIYers like Shara. But after several woodworking projects, Shara has found the most efficient methods (and tools) for sawing it down. If you’re wondering whether to use a table or circular saw to get the job done, Shara shares a few pointers.
“I have a really nice table saw,” says Shara, “but I still prefer using a circular saw to cut my sheets down. Trying to maneuver a heavy sheet of plywood through a table saw by myself is a struggle.”
If you have an extra set of hands, that always helps, but she still highly recommends her favorite method. “It’s much easier to cut it down with a circular saw,” says Shara.
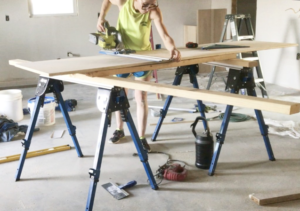
Tips for Setting Up Your Sawing Station
You’ll need to set up a station for cutting with your circular saw – use a workbench or sawhorses. Cutting on the ground also works, if you set down scrap blocks.
“This allows you to lower the blade of your circular saw so that it will cut THROUGH the plywood, but you won’t cut your workbench, sawhorses or anything important,” explains Shara. (She sets up her plywood sheets on Kreg Track Horses.)
Shara has several types of saws but keeps a circular saw that she uses specifically for plywood. If you don’t have multiple saws, be sure to get a plywood cutting blade, which will help to make the job go more smoothly. “These blades typically have a high tooth count to help prevent tear-out for cleaner cuts,” says Shara.
You should attach any sled to your circular saw base according to the manufacturer’s instructions. “It’s important to make sure the sled is attached square on the saw base, and not crooked,” suggests Shara. She uses Kreg’s Rip-Cut Guide and Accu-Cut track, along with a sled that is compatible with both.
After you’ve secured the sled, it can help to test your cuts before you start breaking down plywood. “I set mine up so that I don’t have to adjust the sled when swapping between the [Accu-Cut or Rip Cut] to keep things quick and accurate,” says Shara. “That’s another reason I use one saw specifically for plywood … I never have to remove the sled once I got it dialed in and making accurate cuts.”
Crosscuts + Rip-Cuts
There are a couple of different cuts that you’ll use when you work with plywood: Crosscuts and Rip-Cuts.
Crosscuts go against the wood grain, and rip-cuts go with the grain. “I use my circular saw with my Kreg Rip-Cut guide,” explains Shara, “This guide is designed to rip plywood into strips by running the straight edge along the long edge of the plywood while the circular saw cuts a certain distance away.”
You’ll want to slide your saw onto the guide and set your desired width. “Double-check with a tape measure that the distance from the inside of the blade to the guide matches the width you want,” says Shara. She also shares a few other woodworking tips for rip cuts:
- The blade cut should be on the waste side of the plywood piece.
- Set the blade depth to cut slightly deeper than the plywood sheet.
- Cut from one end of the sheet to the other, with the straight edge tight against the plywood. “It’s important to keep it tight, but also square so that the blade cuts square. This should give you a plywood strip of your desired width,” says Shara.
- Clamp your plywood to the sawhorses to keep it from moving while you’re cutting.
When you’re doing Crosscuts, measure the length that you want your plywood and make a mark on each side of the plank. Shara suggests that you flip the good side of the wood over. “Most tear-out will occur on the top of the cut when using a circular saw, so whatever tear-out you encounter should be on the ‘bad’ side if you flip it upside down,” she explains.
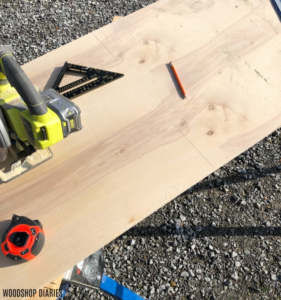
Before you make the Crosscut, ensure there is support wherever the cut is made. “If you only support the ends, the piece will sag at the cut and pinch the blade,” says Shara. You can prevent this risk (and any kickback from the wood) by positioning your sawhorses under the cut or using scrap wood to support it.
Solutions for Sawing Plywood
Woodworkers and DIYers alike use plywood because it offers versatile solutions for style and offers durability you can depend on, especially if you use hardwood plywood. Shara is often asked what type of plywood she uses on projects, and she answers the same every time.
“It doesn’t matter what you’re using it for. If you ask me, I will always, always, always recommend using 3/4 inch PureBond hardwood plywood,” states Shara. “I’ve used some sanded pine for shop projects in the past and, yes, it’s cheaper, BUT I can tell a huge difference in the strength.”
Breaking down plywood for your project might be a challenge, but using the right tools and hardwood plywood products will ensure the job is a success.
See how PureBond hardwood plywood enhanced Shara’s DIY kitchen project. Or you can check out Shara’s other woodworking tips over on her website.